
When you think about it, painting your kitchen cabinets is a pretty straightforward task. After all, you just need to clean them off and then paint them whichever color you choose.
But what if you don’t want to sand the cabinets before painting them? What if you want to skip the whole sanding process? In this blog post, we will also discuss tips for getting the best results from your cabinet painting job.
What is the Purpose of Sanding?
Whether you’re painting your kitchen cabinets or just giving them a good cleaning, it’s always a good idea to sand the surface before applying the paint. This will remove any dirt, dust, and oils that could cause problems when the paint is applied. Plus, it allows the paint to apply better to the surface.
Once the cabinet has been sanded, you can apply your desired paint color using a brush or spray bottle. Make sure to wait until the entire surface has been covered before spraying so that no areas remain unpainted.
When You Should Sand The Cabinets
You should sand your cabinets before painting if they have any noticeable nicks or scratches. These will show up as big, ugly blemishes on the finished product, so it’s best to take care of them beforehand. Furthermore, if the finish on the cabinet is in bad shape, sanding will make it much less likely that the new paint will start peeling and bubbling.
Ultimately, it’s always a good idea to check with the manufacturer of any specific paint before deciding whether or not to sand cabinets before painting.
How to Sand Kitchen Cabinets
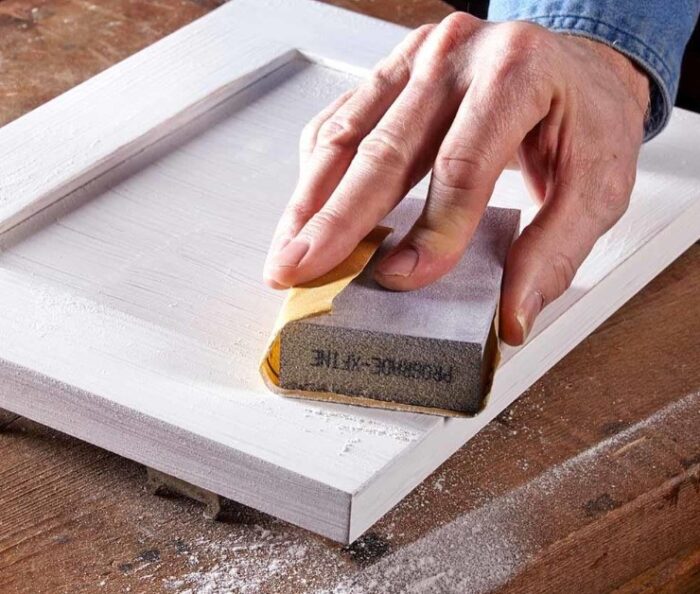
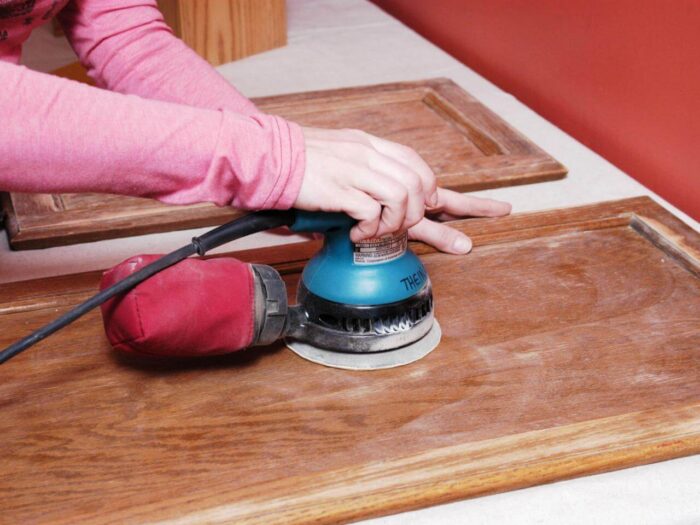
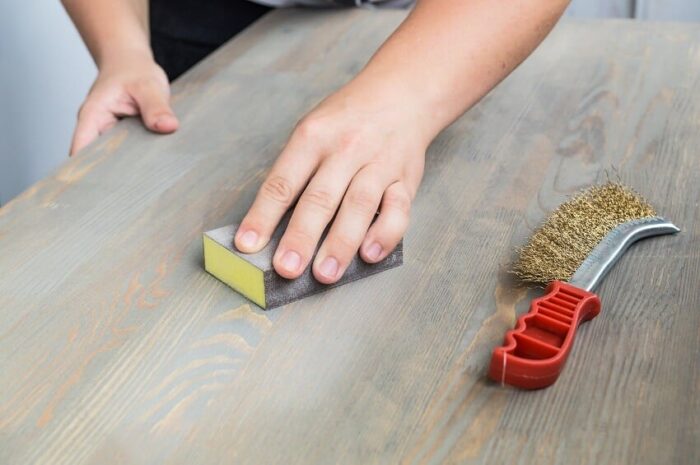
To sand your cabinets, start by using medium-grit sandpaper. Work your way up to a finer grit if necessary. Be sure to wear goggles and a mask when sanding as both particles and dust can be harmful if inhaled.
Here’s how to do it:
- Climb up onto a work surface and place your cabinets face down. Keep in mind the height, width, and depth of the cabinet so you can accurately measure when you’re done.
- Start by sanding with coarse grit sandpaper to remove the old finish.
- Switch to finer grit sandpaper and start smoothing out the edges of the cabinet. You may have to go back and forth between grits as necessary.
- Once all of the rough edges are smoothed out, use a finishing grit sandpaper to achieve a high-gloss finish.
If you’re painting, be sure to prime the surface first with an oil-based primer. If you’re using a sealant, wait until the finish has dried completely before moving on to the next step.
When to Stop Sanding
When the surface is smooth and without any visible imperfections. If there are any scratches or nicks in the finish, sand them until they are gone.
If you have a glossy finish, wait until it has completely dry before moving on to the next step. If your cabinet has a matte finish, you can move on to the next step after it dries for about an hour.
If you over sand your kitchen cabinets, there are a few things that you can do to fix the problem. One option is to use a sandpaper shore that is finer than the original sandpaper.
This will help to smooth out the surface of the cabinet and make it easier to paint or stain. Another option is to use a power sander. This will be more difficult to use, but it will create a smooth, even surface on the cabinet.
Types of Sandpaper
Sandpaper is a versatile tool that can be used for a variety of tasks in the home. The different types of sandpaper can be helpful for different types of painting projects.
There are a few different types you can use for sanding kitchen cabinets. You can use paper, cloth, or an orbital sander.
- Paper: Paper is the cheapest and easiest to use. You just need to wet the paper, place the cabinet on it, and start sanding.
- Cloth: Cloth is more expensive than paper, but it’s also more durable. Just like with paper, you just need to wet the cloth and place the cabinet on it. Then start sanding.
- Orbital Sander: An orbital sander is the most expensive option, but it’s also the most versatile. You can use it on both wood and plastic surfaces. Just be sure to get a model that has appropriate grits (coarse, medium, or fine).
When you should avoid sanding
Cabinets can be painted without sanding, but it’s not always the best option. Sanding can remove the finish and potentially damage the cabinet. If you don’t have to sand the cabinet, be sure to prep it properly by cleaning it with a cleaner and dry-erase marker. Follow the manufacturer’s instructions for painting cabinets.
There are other several reasons why sanding may not be necessary:
- The surface of the cabinet may be covered by a protective finish
- The cabinet may have been treated with a sealer that protects the wood from the paint
- The paint may be an oil-based product that will adhere to the wood even if it is not sanded.
What You Should Do Instead
One option is to simply seal the cabinets with a coat of paint or a finish coat of polish. This will protect the wood from moisture and damage while the paint or polish dries. Just be sure to wait until the final step in the painting process, which is when you wash the cabinets with a high-pressure washer, to apply any additional protection against water infiltration.
Another option is to use vinyl wallpaper as a base for your paint job. Peel off the current wallpaper and cover the cabinet surfaces with painter’s tape. Then apply two coats of paint using an even layer across the surface. Finally, remove all of the painter’s tape and enjoy your newly painted kitchen cabinets!
Conclusion
Hopefully, after reading this article you will have a better understanding of whether or not it is necessary to sand your cabinets before painting them and be able to make an informed decision regarding the best course of action.


