
There is something beautiful and peaceful about landscapes that capture scenic beauty. It is important to process the photographs properly to capture the essence and transfer the magic well. The processing should be done to enhance the image and the atmosphere so that the message of the image can be read well by the recipient.
Good processing will allow for the image to look beyond imagination which can be great for your profession as a photographer. In this guide, we will be mentioning some tips on how to make the landscape photo you took more professional.
Get Rid of the Lens Flare
Removing the lens flare gives the photographer the liberty to capture the sun in all of its glory. It is important to be conscious of the glare. Sometimes the lens flare adds to the image while other times a good photo will be captured without it. You would have to go through a digital blending process after clicking the photo without a lens flare to get the right effect.
No Color Casts to Your Photos
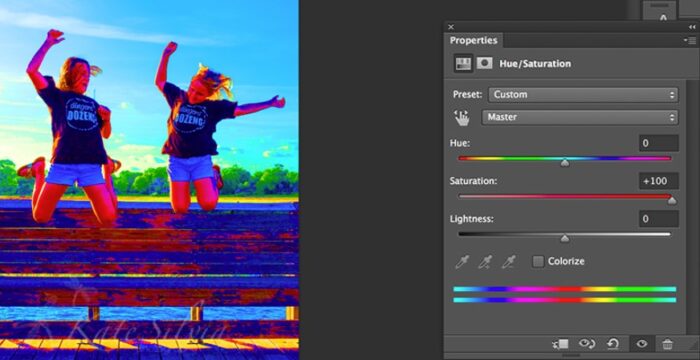
Color casts are inevitable and will appear depending on how one approaches the photography. It is sometimes deliberate and other times coincidental. However, making things professional means removing the color cast. Removing the cast can allow for the restoration of the natural coloring in the landscape. This can create the desired effect with Photoshop.
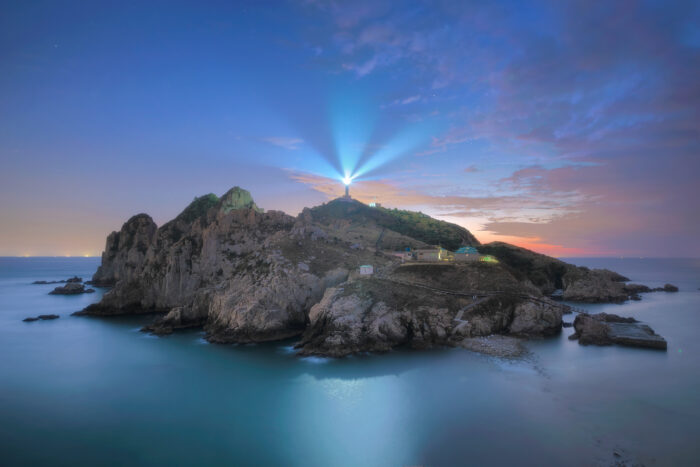
Add Color to The Sky
Yes, you can do it and it is possible to enhance the effects of the photo with some color present in the sky. It is usually ideal for sunrises and sunsets. One can rely on editing tools that let you paint with respect to warmth in the sky and environment.
You will have to create a new layer with which you add color to enhance the mood of the landscape photo. After that, you select the brush and use a foreground color as your basis. It is already available in the original image and will be orange or pink depending on the time of the day you are painting.
You then paint over the sky but very carefully so as to not affect other areas. Pick the blend mode as Overlay to get a good final effect. Mask any and all areas which should not be affected. This will allow you to create the desired effect.
Go With the Orton Effect
This is an effect that can liven up your landscapes with beauty and professionalism. Using the Photoshop package can allow you to customize your images as per the Orton effect. It allows for lighting and contrast adjustments along with luminosity exposure blending. It creates a magical effect and can be used both subtly and dramatically.
At first, to create the Orton effect, you will have to duplicate the image. After that it will have to be applied as the background copy. It will need to be blended on the other layer. One would have to duplicate the layers and then adjust the opacity as per the final effect one likes. A photographer can be selective about the application and decide where to apply this effect and where to leave it out.
It creates a nature photography image with beautiful effects and softened edges. You can get through the haze to create even better final products. It is best to only pick the right art for display indoors. Choosing a professional fine art landscape photographer can help you out with the right art
Use a Gradient Mask
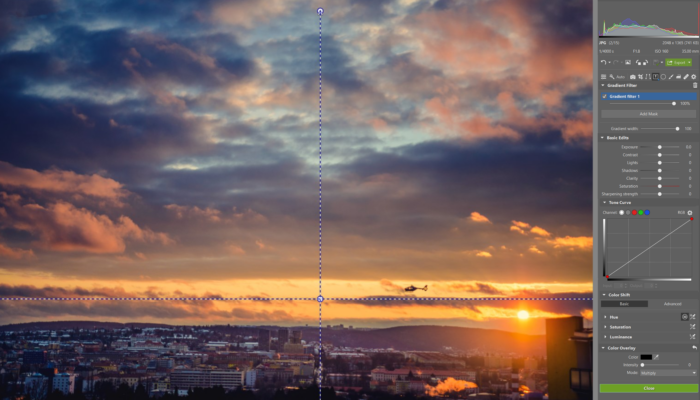
One of the ways by which landscape photos look more professional is if the sky gradient supports a vision. One can edit out the sky and replace it with a gradient if they so like. It adds dramatic effects to the image.
For easy blending of the layers we are using, one can make good use of a gradient mask. Blending two exposures on the ground and in the sky can allow for a balanced image with a good enough range of light.
Enhance the Details for a Good Impact
Showing texture and details in the image is worth the work because of the final photograph. For landscape images, choosing the right texture is very important. It will give appropriate dimensions to the image and will highlight small details to the viewer. Photoshop allows for string detail enhancement which is usually neglected in landscape photography.
It is somewhat different from the Orton effect which relies on softness to give a better impression. However, the detail enhancement should be on the entire image and only on some details. It’s better to do so to make everything seem more professional and somewhat natural. There will be white edging which comes with high sharpness. It should be done away with.
Find the Right Light Balance
Light balance is related to guiding the viewer to a certain point of focus in the photo. One of the ways of doing that is through vignettes. It allows you to create a drawer border and transfer the focus of the image to a place where you want the viewer to focus. You can brighten the area of focus next and darken the borders simultaneously.
It will create a light balance that chooses the right subject to display in the landscape photo. Choosing a vignette does not mean that the darkness overpowers the picture. It can be subtle and complement the rest of the picture. For this process, you will have to first pick the Darken/Lighten Center. Then you will have to adjust the center and border luminosity.
The Takeaway
Landscape photos can easily look more professional with the help of targeted editing and software like Photoshop. One will have to find the right light balance and adjust the blending to give a better color to the sky. There are instances when the Orton effect and a gradient mask can brighten up the magic of the landscape so make sure you try that too.


