
So you want to be a YouTuber? It’s not as easy as it looks. First, you need to find a good topic. Something that people will want to watch. Second, you need to make sure your lighting is just right. And third, you need to make sure your lighting is on point! Here’s how you do that.
What Is Bi Lighting And Why Should You Use It In Your Videos?
Bi lighting is a special type of lighting that can help you create more professional-looking videos. It’s a simple light setup that uses an LED light to illuminate the subject in a special manner.
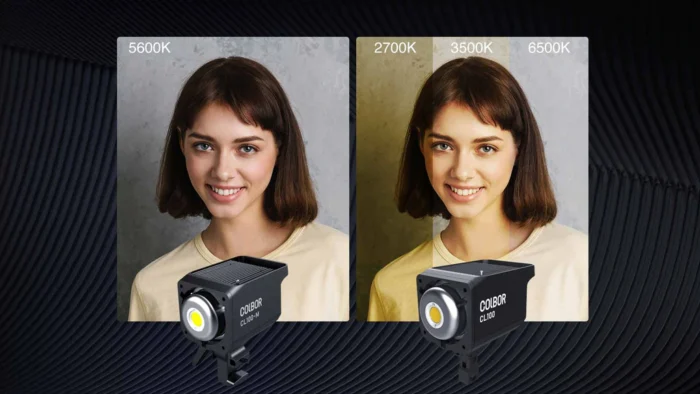
How special? Well, with a bi-color light panel, you can easily play around with light temperature. You can make your shots look warmer, or colder, or you can simply match the color of your ambient lights in an instant.
There are many reasons why you might want to use bi-lighting in your videos. Perhaps you’re trying to create a more polished look, or you want to add some dimensionality to your shots. Whatever the reason, bi-color LED lights can help take your videos up a notch or two.
Tips For Using Bi Lighting To Improve The Look Of Your Videos
Now that we know what bi-color video light is, let’s take a look at some tips to make your YouTube videos pop!
1. Use A High-Quality LED Light Panel For Even, Consistent Lighting
You need a good bi-light to have good lighting in your videos. You want the light to be even and consistent if you want to achieve that professional look. On that note, you don’t want to go out and shop for some cheap lights on Amazon.
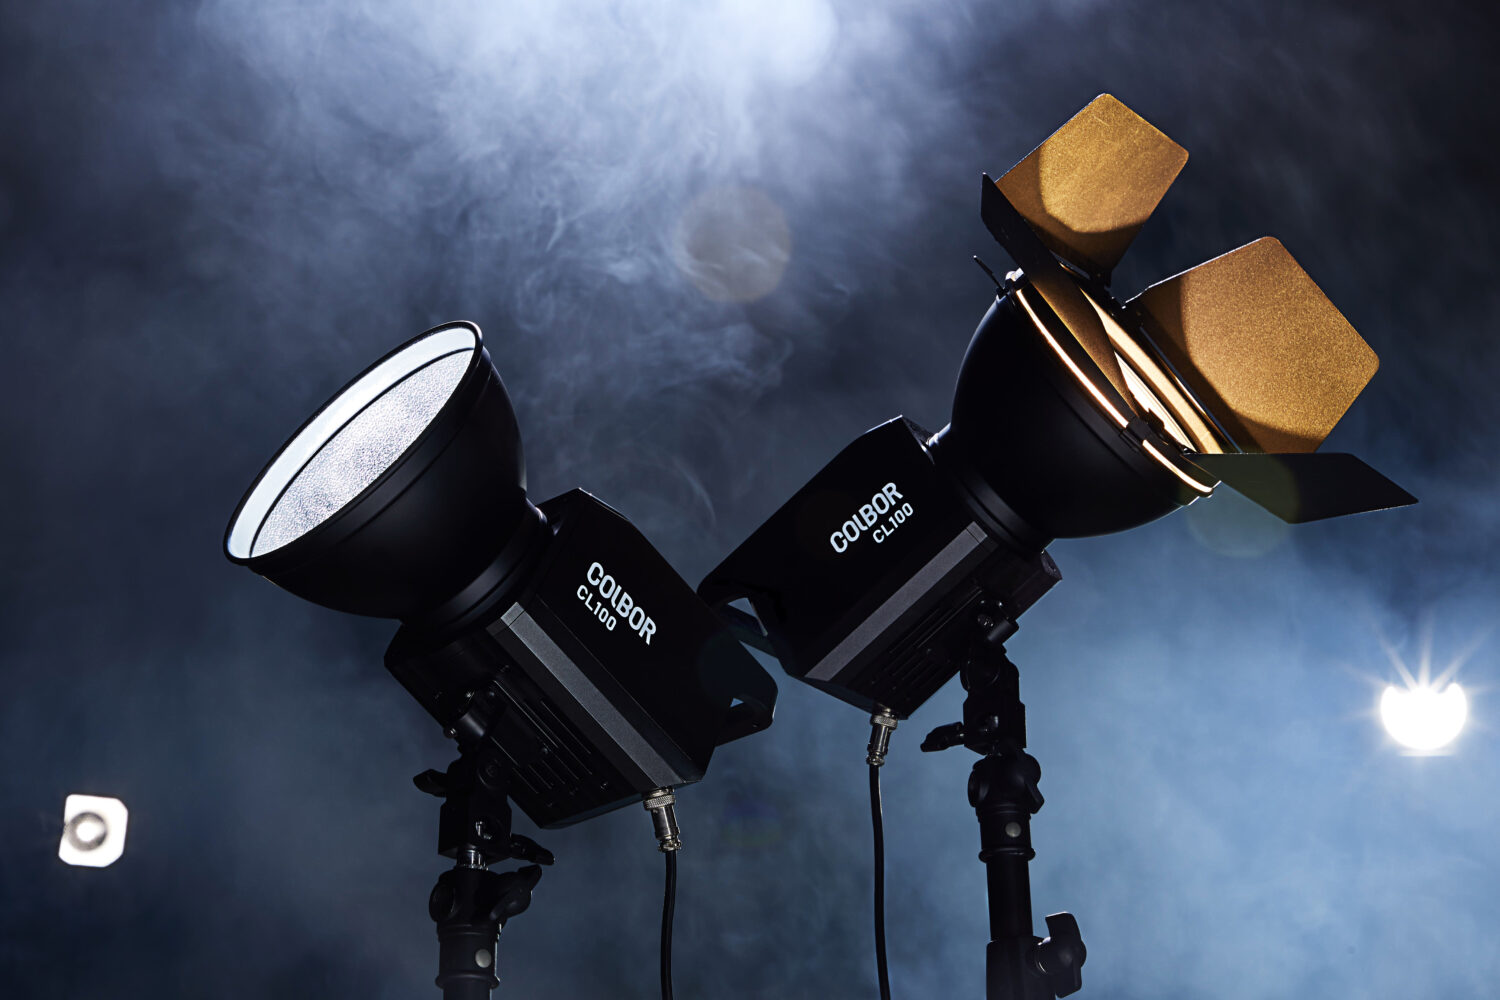
Instead, go with a reputable brand with good reviews and great products. For example, COLBOR provides a category of bi-color LED lights and daylight lights. You can use those.
2. Place The Light Panel Close To Your Subject For Even Lighting
If you want your subject to be evenly lit, then you need to place the light panel close to them. This will help ensure that the light is distributed evenly across their face and body, depending on the shot you’re going for.
Plus, doing this will help you create shadows you like or even reduce any shadows that might appear in the shot. It all depends on the placement of the light fixture.
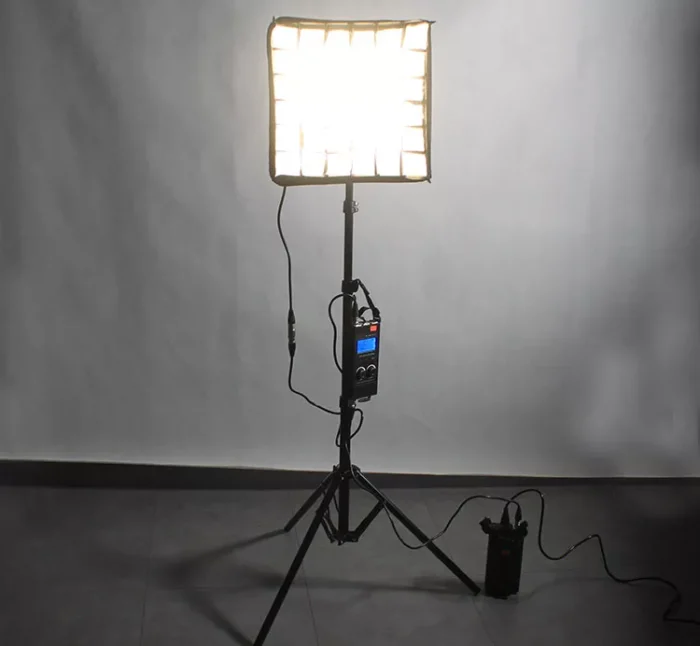
3. Use A Diffuser To Soften The Light And Prevent Any Hot Spots Or Glare
No one likes hot spots or glare in their videos, least of all YouTubers. If you want to avoid those, then you need to use a diffuser or a softbox with your bi-lighting setup. This will help soften the light and prevent any hard edges from appearing in the shot.
You might think those would be relatively easy to fix in post, but they’re really not. There aren’t that many details in highlights as everything’s blown out, so if you try to solve this issue in Premiere Pro, later on, you might end up with a butchered video.
4. Experiment With Different Positions To See What Looks Best
When it comes to lighting, there’s no one right way to do things. You need to experiment with different positions and placements to see what looks best for your shot.
For example, you might want to place the light panel directly in front of your subject’s face if you’re going for a close-up shot. Or, if you’re going for a dramatic look – do the complete opposite and place the light behind the subject to create an eerie look.
5. Match The Color Of Your Light Panel To The Ambient Light For A Natural Look
If you want your video to look natural, then you need to make sure the color of your light panel matches the ambient light in the room. This will help create a more seamless look and prevent any weird color casts from appearing in the shot.
The easiest way to do this is by using a bi-color LED light panel as they give you the flexibility to change the color temperature on the fly. This way, you can quickly and easily match the light panel to the ambient light in the room for an even, natural shot.
6. Learn How To Work Different Color Temperatures
If you want to get really creative with your shots, then you need to learn how to work different color temperatures into your video. This is where bi-color LED lights to come in handy.
For example, you might want to start off with a warm color temperature for the first part of the video and then gradually change it to a cooler color temperature as the video progresses. This can help create a more dynamic and interesting video.
7. Try Different Intensity Levels To See What Works Best For Your Scene
Depending on the scene, you might want to experiment with different intensity levels for your bi lighting setup. If you’re shooting a close-up shot, then you might want to go with a higher intensity level to really make your subject pop.
However, if you’re shooting a wide shot or a scene with multiple subjects, then you might want to go with a lower intensity level to avoid blowing out the shot. Again, it all comes down to experimentation to see what works best for your particular scene.
8. Use Multiple Light Panels For A More Professional Look
If you really want your videos to look professional, then you might need to use multiple light panels in your bi-lighting setup. This will help you create a more even and flattering light on your subject.
Of course, using multiple light panels will also require you to spend more time and effort on an actual setup, but that extra time and effort will be worth it in the end when you see how much better your videos look.
9. Learn How To Edit Your Videos In Post
There’s only so much you can do with lights alone, so if you want to get the most out of your bi-lighting setup, then you need to learn how to edit your videos in post-production. This will allow you to really fine-tune the look of your shots and create the exact video that you want.
There are a lot of different editing techniques that you can use, so it’s worth taking some time to learn the basics. Once you know how to edit your videos, you’ll be able to create any type of shot that you can imagine.
Final Tip – Have Fun And Try Out New Things!
Ultimately, the best way to learn how to use bi-lighting is to just have fun and experiment. Don’t be afraid to try new things and see what works best for your particular setup. The more you experiment, the better your videos will look in the end.

")


